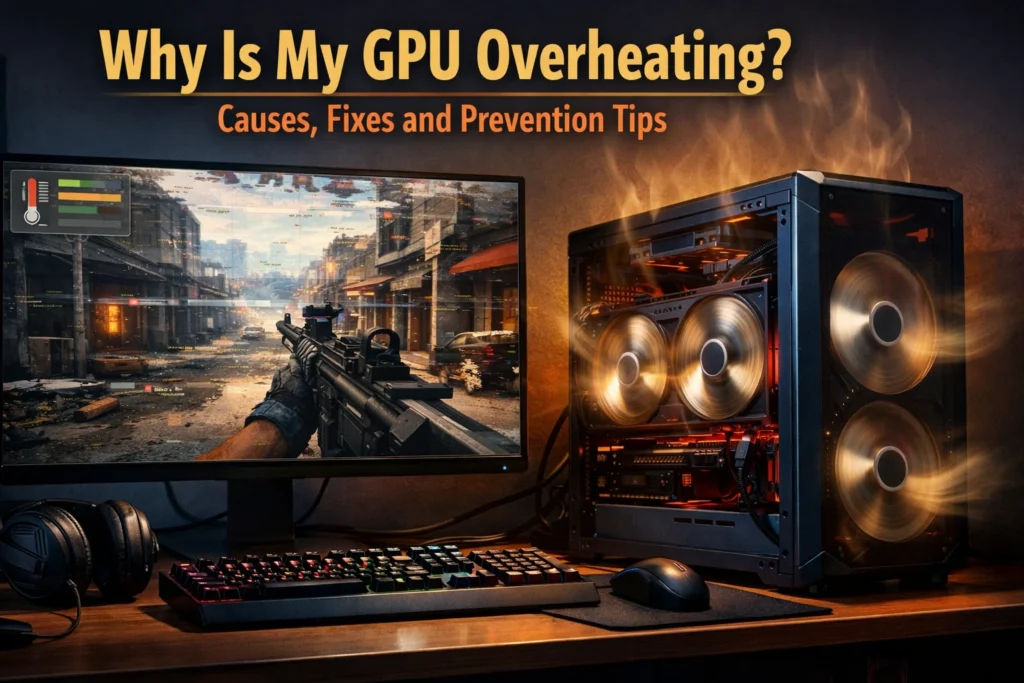
Your graphics card is running too hot, and you’re not alone in dealing with this frustrating problem. GPU overheating affects gamers, content creators, and anyone pushing their system hard, leading to crashes, performance drops, and potential hardware damage.
This guide walks you through everything you need to know about keeping your graphics card cool. You’ll learn how to spot the warning signs before serious damage occurs, discover the most common reasons your GPU temperature spikes, and get practical solutions that actually work.
We’ll cover essential hardware fixes like improving airflow and replacing thermal paste, plus software-based techniques to manage temperatures without opening your case. You’ll also get proven prevention tips to keep your GPU running cool for years to come.
Recognizing GPU Overheating Warning Signs
Unusual fan noise and excessive spinning speeds
Your GPU fans are usually the first to signal trouble when temperatures climb too high. When your graphics card starts overheating, you’ll hear the fans ramping up to their maximum speed, creating a much louder whirring or buzzing sound than normal. This aggressive fan behavior happens because the card’s thermal sensors detect dangerous temperature levels and automatically push the cooling system into overdrive.
Pay attention to when these loud fan noises occur. If your GPU fans are constantly spinning at high speeds even during basic tasks like web browsing or watching videos, something’s definitely wrong. Healthy graphics cards should run quietly during light workloads, with fans either completely stopped or spinning at low speeds.
The sound itself can also tell you a lot. A grinding, rattling, or clicking noise suggests mechanical issues with the fan bearings, which compromises cooling effectiveness. Some fans may even stop working entirely, leaving your GPU with reduced cooling capacity and pushing the remaining fans to work overtime.
Screen artifacts, flickering, and display glitches
Visual anomalies on your screen are clear indicators that your GPU is struggling with heat. As temperatures rise beyond safe operating limits, you’ll start seeing various display problems that range from annoying to completely unusable.
Common visual symptoms include:
- Colored dots or lines appearing randomly across your screen
- Texture corruption in games where objects look melted or distorted
- Color banding or strange color shifts in images and videos
- Screen tearing that appears as horizontal splits in moving images
- Flickering displays that flash or strobe intermittently
These artifacts happen because excessive heat interferes with the GPU’s ability to process and render graphics data correctly. The silicon components become unstable at high temperatures, causing calculation errors that manifest as visual glitches. What starts as occasional pixel errors can quickly escalate to severe corruption that makes your screen completely unreadable.
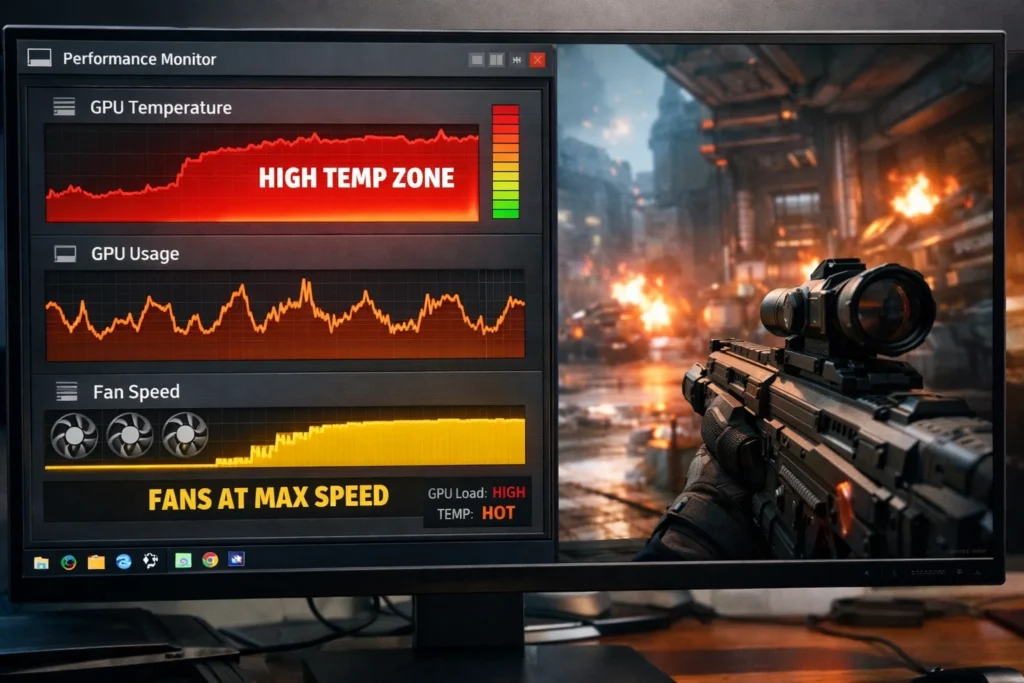
Sudden frame rate drops and gaming performance issues
Gaming performance takes a massive hit when your GPU overheats. You’ll notice frame rates dropping significantly below normal levels, even in games that previously ran smoothly. This performance degradation doesn’t happen gradually – it’s often sudden and dramatic.
Your graphics card has built-in thermal throttling mechanisms that automatically reduce clock speeds when temperatures get too high. This safety feature prevents permanent damage but kills your gaming experience. Frame rates can drop by 50% or more during thermal throttling events.
Watch for these performance warning signs:
- Stuttering gameplay where smooth motion becomes jerky
- Loading screen freezes that last longer than usual
- Input lag where your controls feel unresponsive
- Graphical settings automatically reducing without your input
Temperature monitoring software will show you exactly what’s happening. If you see your GPU hitting 90°C or higher during gaming sessions, thermal throttling is definitely occurring.
System crashes and unexpected shutdowns
When overheating reaches critical levels, your computer will protect itself by shutting down or crashing completely. These aren’t the typical blue screen errors you might see from software problems – they’re abrupt, immediate shutdowns that happen without warning.
Your system might restart itself automatically, or it could freeze completely, requiring you to hold the power button to turn it off. These thermal shutdowns usually occur during demanding tasks like gaming, video rendering, or cryptocurrency mining when the GPU is working hardest.
Some systems will display temperature-related error messages before shutting down, while others simply cut power to prevent hardware damage. If you’re experiencing frequent crashes during graphics-intensive activities, especially if they happen more often in warm weather or after extended use, overheating is likely the culprit.For more information on what temperatures are considered “normal” for specific cards, you can check the Tom’s Hardware GPU Benchmark and Thermal Hierarchy to see where your model stands.
Common Causes Behind GPU Temperature Problems
Dust Accumulation Blocking Airflow and Cooling Systems
Dust buildup is the silent killer of graphics cards. Over months and years of operation, microscopic particles from your environment slowly accumulate on your GPU’s cooling components. This seemingly harmless layer of dust creates an insulating barrier that prevents proper heat dissipation.
Your graphics card’s fans work overtime trying to pull air through clogged heatsink fins, but the airflow becomes severely restricted. The result? Hot air gets trapped around the GPU chip, causing temperatures to spike dangerously high. Pet hair, fabric fibers, and general household dust are particularly problematic because they form dense mats that completely block air passages.
The problem compounds itself – as dust accumulates, cooling efficiency drops, which forces the GPU to throttle performance or triggers thermal shutdown protection. Regular cleaning every 3-6 months prevents this buildup before it becomes critical.

Insufficient Case Ventilation and Poor Air Circulation
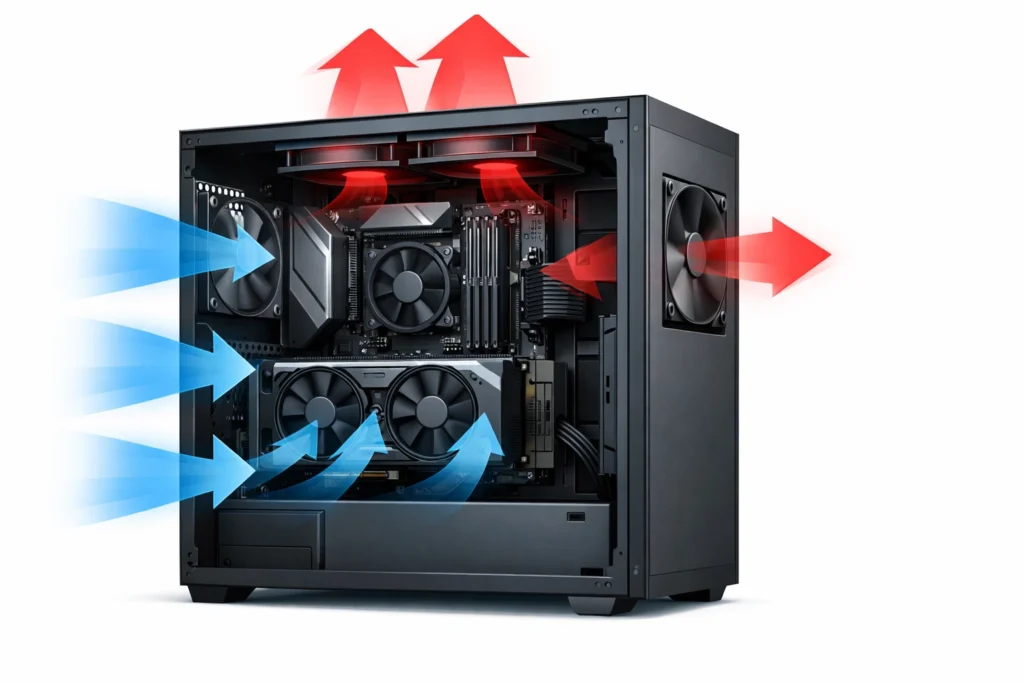
Your GPU doesn’t exist in isolation – it relies on your entire case’s airflow design to stay cool. Many gaming builds focus heavily on aesthetics while neglecting proper ventilation principles. Without adequate intake and exhaust fans working in harmony, hot air stagnates around your graphics card.
Poor cable management creates additional obstacles for airflow. Loose cables draped across the GPU area disrupt the smooth air movement needed for effective cooling. Side-mounted or vertical GPU configurations can also trap heat if not properly planned.
Case placement matters too. Cramped spaces under desks or inside enclosed furniture cabinets restrict natural convection cooling. Your case needs breathing room on all sides to function as designed.
Aging Thermal Paste Losing Effectiveness Over Time
Thermal paste serves as the crucial bridge between your GPU chip and its heatsink. Fresh thermal compound fills microscopic gaps and creates optimal heat transfer. However, thermal paste doesn’t last forever – it gradually dries out, becomes less viscous, and develops air pockets that insulate rather than conduct heat.
Most graphics cards ship with basic thermal paste that starts degrading after 2-3 years of regular use. High-performance cards under heavy gaming loads may see thermal paste deterioration even sooner. The temperature difference between fresh and degraded thermal paste can be 10-15°C or more.
Replacing thermal paste requires careful disassembly but often provides immediate temperature improvements. Quality aftermarket thermal compounds typically outperform factory applications and maintain effectiveness longer.
Essential Hardware Solutions for Temperature Control
Deep cleaning dust from GPU fans and heat sinks
Dust is the #1 culprit behind overheating. A thorough cleaning can often drop temperatures by 10–15°C. To do this properly without damaging your hardware, you should follow a professional guide on how to clean a graphics card safely to ensure you don’t build up static or damage the sensitive fan bearings.

Replacing degraded thermal paste
If your card is several years old, replacing the factory paste with high-quality compounds like Arctic MX-4 or Thermal Grizzly Kryonaut can reduce temperatures by another 5–10°C.
Upgrading case fans
Ensure you have a balanced airflow setup. Aim for a 2:1 or 3:2 intake-to-exhaust ratio. Position intake fans to feed cool air directly toward your GPU, while exhaust fans remove the rising hot air.
Replacing degraded thermal paste with quality compounds
Thermal paste acts as the critical bridge between your GPU die and its cooling system. Factory thermal paste typically lasts 2-4 years before degrading, creating air gaps that dramatically increase temperatures. Signs of degraded thermal paste include sudden temperature spikes and inconsistent cooling performance.
Quality thermal compounds like Arctic MX-4, Thermal Grizzly Kryonaut, or Noctua NT-H1 can reduce GPU temperatures by 5-10°C compared to aged factory paste. The application process requires careful disassembly of your GPU cooler – document screw locations and cable connections before starting.
Clean the old paste completely using isopropyl alcohol and lint-free cloths. Apply a small rice-grain-sized amount of new thermal paste to the center of the GPU die. Avoid spreading it manually; the mounting pressure will distribute it evenly. Remember that more paste isn’t better – excess thermal compound can actually insulate rather than conduct heat.
Upgrading case fans for improved airflow management
Your GPU doesn’t operate in isolation – it depends on your case’s airflow ecosystem for optimal temperatures. Poor case ventilation creates hot air pockets that force your GPU to work harder. Strategic fan upgrades can create the positive pressure environment your graphics card needs to stay cool.
Install intake fans at the front of your case and exhaust fans at the rear and top. A balanced 2:1 or 3:2 intake-to-exhaust ratio works well for most setups. Position intake fans to feed cool air directly toward your GPU, while exhaust fans remove hot air from above and behind the card.
Quality fans like Noctua NF-A12x25, Arctic P12, or be quiet! Silent Wings make significant differences in both airflow volume and noise levels. Consider PWM-controlled fans that automatically adjust speed based on temperature sensors.
Installing aftermarket GPU coolers for better performance
When standard solutions aren’t enough, aftermarket GPU coolers offer the ultimate temperature control. These solutions range from dual-fan upgrades to liquid cooling systems that can drop GPU temperatures by 20-30°C compared to stock coolers.
Popular options include the Arctic Accelero series, EVGA Hybrid kits, and custom loop liquid cooling. Dual and triple-fan aftermarket air coolers typically offer the best price-to-performance ratio, while AIO liquid coolers provide maximum cooling potential for high-end cards.
Before purchasing, verify compatibility with your specific GPU model and PCIe slot clearance. Some aftermarket coolers are thicker than stock solutions and might interfere with adjacent expansion slots. Installation usually involves complete disassembly of the original cooling system, so plan for a 2-3 hour project.
Budget around $50-150 for quality aftermarket air cooling, or $100-200 for liquid cooling solutions. The investment pays off through lower temperatures, reduced fan noise, and extended GPU lifespan.
Software-Based Temperature Management Techniques
Adjusting fan curves through GPU control software
Most modern graphics cards come with manufacturer software that lets you take direct control over your cooling fans. MSI Afterburner, EVGA Precision X1, and AMD’s Adrenalin software give you the power to create custom fan curves that respond exactly how you want them to.
The default fan curve on most GPUs is designed to balance noise and cooling, but it often prioritizes quiet operation over temperature control. By creating a more aggressive fan curve, you can drop your GPU temperatures by 5-15°C without any hardware modifications.
Start by monitoring your current temperatures during gaming sessions. Most users find that setting fans to ramp up earlier – around 60°C instead of the typical 70°C – makes a significant difference. A good starting point is setting your fans to 50% speed at 65°C, 75% at 75°C, and 100% at 80°C.
Key fan curve settings to consider:
· Minimum fan speed: Set to 20-30% to ensure constant airflow
· Target temperature: Aim for 65-75°C under load
· Ramp-up speed: Gradual increases prevent sudden noise spikes
· Maximum temperature: Never let fans hit 100% before 80°C
Undervolting your graphics card for lower heat output
Undervolting reduces the voltage your GPU receives while maintaining the same performance levels. This technique can drop temperatures by 10-20°C and reduce power consumption by 15-25% without sacrificing frame rates.
Modern GPUs often receive more voltage than necessary from the factory to ensure stability across all units. By finding your specific card’s optimal voltage, you can achieve the same clock speeds with less heat generation.
MSI Afterburner’s voltage curve editor is the most popular tool for this process. Start by stress-testing your GPU at stock settings to establish baseline performance and temperatures. Then gradually reduce voltage in small increments (10-20mV) while maintaining your desired clock speeds.
Safe undervolting process:
1. Baseline testing: Run stress tests for 30 minutes at stock settings
2. Gradual reduction: Lower voltage by 10-20mV increments
3. Stability testing: Test each setting for at least 15 minutes
4. Performance verification: Ensure frame rates remain consistent
5. Final stress test: Run extended testing on your final settings
The sweet spot for most cards is between 850-950mV, but every GPU is different. Some high-end cards can handle aggressive undervolts down to 800mV, while others need more conservative reductions.
Setting frame rate limits to reduce GPU workload
Capping your frame rate is one of the easiest ways to reduce GPU temperatures instantly. When your graphics card isn’t pushing maximum frames, it generates significantly less heat and consumes less power.
If you have a 60Hz monitor, limiting games to 60 FPS prevents your GPU from wasting energy rendering frames you can’t see. Even with high-refresh monitors, you might not need 200+ FPS in every game – especially single-player titles where competitive advantages don’t matter.
Effective frame limiting methods:
| Method | Pros | Cons |
| In-game V-Sync | Built into most games | Can cause input lag |
| NVIDIA Control Panel | System-wide control | Limited to NVIDIA cards |
| AMD Radeon Chill | Dynamic frame limiting | AMD cards only |
| RivaTuner Statistics Server | Universal compatibility | Requires separate download |
For competitive gaming, consider limiting frames to your monitor’s refresh rate plus 20-30 FPS. This maintains smooth gameplay while preventing unnecessary heat buildup. Single-player games can often be limited to 60-75 FPS without any noticeable impact on experience.
Dynamic frame rate limiting is even more effective. Tools like AMD’s Radeon Chill automatically reduce frame rates during less demanding scenes, then ramp up during action sequences. This intelligent approach keeps temperatures lower during extended gaming sessions while maintaining responsiveness when it matters most.
Proven Prevention Strategies for Long-Term GPU Health
Regular Cleaning Schedules to Maintain Optimal Airflow
Dust accumulation is your GPU’s worst enemy, yet many users overlook this simple maintenance task until problems arise. Graphics cards act like powerful vacuum cleaners, pulling air through their cooling systems and inevitably collecting dust, pet hair, and other particles that block airflow passages.
Create a cleaning routine based on your environment. If you have pets, smoke indoors, or live in a dusty area, clean your GPU monthly. For cleaner environments, every 2-3 months works well. Use compressed air to blow out dust from the heatsink fins, being careful to hold fans in place while cleaning to prevent damage from overspeeding.
Remove the GPU from your system for thorough cleaning every 6-12 months. This allows you to clean hard-to-reach areas and replace thermal paste if needed. When cleaning, work in short bursts with compressed air to avoid moisture buildup, and always ensure your system is completely powered off and unplugged.
Pay special attention to the intake fans and exhaust areas. Dust buildup here creates a domino effect, reducing overall system airflow and forcing your GPU to work harder. A clean GPU can run 10-15°C cooler than a dust-clogged one, significantly extending its lifespan.
Monitoring Temperatures with Reliable Software Tools
Temperature monitoring transforms GPU maintenance from guesswork into data-driven decisions. Without proper monitoring, you’re flying blind, potentially missing early warning signs of thermal problems.
Popular monitoring tools include MSI Afterburner, GPU-Z, and HWiNFO64. These programs provide real-time temperature readings, historical data, and customizable alerts. Set up temperature alarms at 80°C for warnings and 85°C for critical alerts. Most modern GPUs can handle temperatures up to 95°C, but sustained operation above 80°C reduces their lifespan.
Monitor temperatures during different scenarios: idle desktop use, light gaming, and intensive gaming sessions. Healthy GPUs typically idle at 30-40°C and peak at 70-80°C under full load. If you see temperatures consistently above 85°C during gaming, take action immediately.
Create temperature logs for troubleshooting patterns. Some users notice temperature spikes during specific games or after driver updates. This data helps identify whether issues stem from software changes, dust buildup, or failing hardware components.
Set up automatic fan curves using MSI Afterburner or similar tools. These curves increase fan speed as temperatures rise, providing proactive cooling before problems develop.
Maintaining Proper Case Positioning and Cable Management
Your computer case position directly impacts GPU temperatures through airflow dynamics. Cases placed on carpet, against walls, or in enclosed spaces create thermal bottlenecks that force your GPU to work harder.
Position your case on hard surfaces like desks or stands, allowing at least 6 inches of clearance on all ventilated sides. Avoid placing cases inside desk cubicles or entertainment centers where hot air gets trapped. The front intake should face open space, and rear exhaust needs clear paths for hot air removal.
Cable management plays a bigger role in GPU cooling than most people realize. Messy cables create turbulent airflow, reducing cooling efficiency and creating hot spots. Route power cables away from GPU fans and use cable ties to secure loose wires.
Pay attention to GPU power cable routing. These thick cables can block airflow if positioned poorly. Modern modular power supplies allow custom cable lengths, eliminating excess cable bulk inside your case. If using cable extensions, choose sleeved options that maintain better shape and create less airflow obstruction.
Large GPUs often sag over time, potentially affecting cooling performance. Use GPU support brackets or stands to maintain proper positioning and prevent stress on PCIe slots and cooling systems.
Creating Adequate Workspace Ventilation Around Your PC
Room temperature and airflow around your computer setup significantly impact GPU cooling performance. A computer in a hot, stuffy room will always run warmer than one in a cool, well-ventilated space.
Keep room temperatures below 75°F (24°C) when possible. Every degree of ambient temperature reduction translates to lower GPU temperatures. Air conditioning isn’t always necessary – strategic fan placement can improve room airflow dramatically.
Position your computer away from heat sources like radiators, space heaters, direct sunlight, or other electronics that generate heat. Gaming setups often include multiple monitors, speakers, and other equipment that collectively raise ambient temperatures.
Create airflow patterns in your room using ceiling fans or strategically placed desk fans. Moving air helps dissipate heat more effectively than stagnant air. Some enthusiasts place small desk fans near their computer cases to assist with intake airflow, though this shouldn’t be necessary with proper case ventilation.
Consider the thermal load of your entire setup. Multiple high-performance computers, servers, or mining rigs in one room create challenging cooling conditions that require enhanced ventilation or air conditioning to maintain safe operating temperatures.
Conclusion
Your GPU’s temperature directly impacts your gaming performance and hardware lifespan. When you notice artifacts on screen, sudden frame drops, or your computer shutting down unexpectedly, these are clear signs your graphics card is running too hot. The main culprits are usually dust buildup blocking airflow, failing cooling fans, poor case ventilation, or simply pushing your GPU beyond its limits without proper cooling support.
Taking action doesn’t have to be complicated or expensive. Start with the basics: clean out dust from your GPU fans and heatsink, check that all cooling fans are working properly, and make sure your case has good airflow with intake and exhaust fans positioned correctly. You can also use software tools to create custom fan curves and monitor temperatures in real-time. Regular maintenance like monthly dust cleaning, keeping your drivers updated, and avoiding extreme overclocking will keep your GPU running cool and extend its life significantly. Don’t wait until problems appear – a little prevention now saves you from costly repairs or replacements later.
FAQ Section
1. What is a safe temperature for a GPU?
Generally, a GPU running below 80–85°C under load is considered safe. If temps consistently exceed this range during gaming or heavy tasks, cooling improvements may be needed.
2. Why is my GPU getting so hot even when not gaming?
High idle temperatures can be caused by poor airflow, dust buildup, failing fans, or background processes pushing the GPU. Regular cleaning and checking cooling setup helps.
3. Can old thermal paste cause GPU overheating?
Yes. Thermal paste degrades over time and loses heat transfer efficiency, which can significantly raise GPU temps. Replacing it often lowers temperatures by a noticeable amount.
4. Does overclocking make GPUs run hotter?
Absolutely. Overclocking increases clock speeds and power draw, which directly increases heat output. Without improved cooling, this can lead to overheating.
5. Can outdated drivers cause GPU overheating?
Outdated or corrupted graphics drivers can interfere with fan control or power management, leading the GPU to run hotter than necessary. Keeping drivers updated helps prevent this.
6. How often should I clean my GPU to prevent overheating?
Cleaning the GPU dust and vents every 3–6 months is recommended, especially if your environment is dusty or you use the PC heavily. This helps maintain proper airflow and cooling.
7. Will capping the frame rate help reduce GPU temperature?
Yes. Limiting FPS (e.g., to your monitor’s refresh rate) reduces workload and heat output, which can lower average GPU temperature.
8. What should I do if my GPU suddenly overheats?
Check for blocking dust, failing fans, sudden driver issues, or unstable overclocking, and address each step systematically to find the root cause.