Smartwatch setup without an App complete guide for easy time setting You’ve just received a new smartwatch, or perhaps your phone died at the worst possible moment. Your wrist device shows the wrong time, but the companion app isn’t accessible. Don’t panic. Modern smartwatches are more independent than you might think, offering multiple pathways to configure settings without smartphone assistance.
This comprehensive smartwatch setup guide reveals every method for adjusting time settings manually. Whether you own an Apple Watch, Samsung Galaxy Watch, Garmin, Fitbit, or any other brand, you’ll discover practical solutions that work when apps fail. From touchscreen navigation to voice commands, we’ll explore techniques that put you in control of your device’s most fundamental function.
Understanding Your Smartwatch Setup Without an App
Before diving into specific methods, understanding your device’s architecture helps determine which approach works best for your situation.
Operating Systems That Power Your Wrist
Smartwatches run on various operating systems, each with unique characteristics. Apple Watch uses watchOS, seamlessly integrated with iOS but requiring an iPhone for initial setup. Samsung devices utilize either Tizen or the newer Wear OS platform with One UI Watch interface. Google’s Pixel Watch and many other Android compatible devices operate on Wear OS, offering flexibility across manufacturers.
Garmin, Fitbit, and brands like Polar use proprietary systems optimized for fitness tracking and battery longevity. These custom operating systems often provide more straightforward manual controls since they’re designed for outdoor activities where phone connectivity isn’t guaranteed. Understanding your device’s operating system reveals which settings menus to navigate and what limitations you might encounter.
Built In Features for Independent Operation
Most contemporary smartwatches include onboard settings accessible directly from the device. Touchscreen models let you swipe through menus, while button based designs use physical controls for navigation. GPS enabled watches can synchronize time automatically using satellite signals, eliminating the need for phone connections entirely.
Voice assistants represent another independent feature. Google Assistant, Siri, and Bixby respond to spoken commands, allowing hands free time adjustments. World clock applications come pre installed on many devices, providing alternative methods for displaying correct local time when primary settings prove troublesome.
When You Actually Need a Phone Connection
Some smartwatch functions genuinely require smartphone pairing. Initial device activation often mandates app based setup, particularly for Apple Watch. Advanced features like cellular connectivity activation, detailed health data analysis, and certain third party applications need companion app configuration.
However, basic timekeeping doesn’t fall into this category. Once initially configured, smartwatches maintain time independently. Even if you later lose phone access, manual time adjustment remains possible through device menus. Understanding this distinction prevents unnecessary frustration when troubleshooting time related issues.
Why Accurate Time Settings Matter
Correct time configuration affects far more than simple time display. Your smartwatch orchestrates numerous functions around its internal clock.
Impact on Notifications and Reminders
Message notifications, calendar alerts, and reminder prompts all depend on accurate time settings. When your watch displays incorrect time, scheduled notifications arrive at wrong moments or fail to appear entirely. Meeting reminders meant for 3 PM might trigger at random hours, creating confusion and missed appointments.
Email synchronization also relies on proper time configuration. Security protocols verify timestamps to prevent fraudulent access. Incorrect device time can trigger authentication failures, blocking access to email accounts and messaging services even when credentials are correct.
Fitness Tracking Accuracy
Exercise sessions logged with wrong timestamps corrupt health data analysis. Your fitness trends, recovery patterns, and training recommendations depend on chronologically accurate workout records. Morning runs recorded as midnight activities skew daily activity patterns and sleep tracking algorithms.
Heart rate variability measurements and stress level assessments also factor in time of day variations. Your body’s circadian rhythms influence these metrics, making temporal accuracy essential for meaningful health insights. Incorrectly timestamped data diminishes the value of long term fitness tracking.
Calendar Event Synchronization
Calendar applications synchronize across devices using time based protocols. When your smartwatch displays different times than your phone or computer, event scheduling becomes chaotic. You might accept a meeting invitation on one device only to see conflicting times elsewhere.
Time zone discrepancies particularly affect travelers. Business professionals crossing time zones need watches that reflect current local time while maintaining accurate meeting schedules in home time zones. Proper time configuration prevents embarrassing conference call mishaps and missed flight notifications.
Manual Time Setting Through Device Menu
The most reliable approach for setting time without apps involves navigating directly to your smartwatch’s settings menu.
Accessing Settings on Touchscreen Devices
Wake your smartwatch screen by tapping the display or pressing the power button. On most devices, swipe down from the top edge to reveal quick settings. Look for a gear icon representing the settings menu this universal symbol appears across nearly all smartwatch brands.
Alternatively, some watches require swiping left or right from the home screen to access the app menu. Scroll through available icons until you locate Settings. Tap this icon to enter the main configuration area where time adjustments await.
Once inside settings, navigate to System or Device options. Within this submenu, locate Date and Time settings. Different manufacturers use varying terminology, but options like Clock, Time Setting, or Time and Date all lead to the same configuration area. Tap this selection to proceed with manual adjustment.
Navigation for Button Based Smartwatches
Button operated watches like many Garmin models require different navigation techniques. Press and hold the up or back button until the menu appears. Scroll through options using directional buttons until Settings becomes highlighted. Press the select button (usually the middle button) to enter.
Navigate to System Settings or General options using the same button sequence. Continue scrolling until Date and Time appears in the menu list. Select this option, then choose Manual instead of Automatic if both options appear. Use directional buttons to increment or decrement hours and minutes until the correct time displays.
Some models feature combination controls buttons for primary navigation with limited touchscreen functionality. Experiment with your specific device’s controls, as button sequences vary between manufacturers. Consult your watch face briefly many models display a tutorial icon during first time setup that explains button functions.
Adjusting Hours Minutes and Date
After reaching time settings, you’ll encounter fields for hours, minutes, and sometimes seconds. Tap the hour field first on touchscreen devices. A numerical selector or scrolling wheel appears. Adjust values by tapping plus/minus buttons or swiping up/down to change numbers.
Pay careful attention to AM/PM designation if your watch uses 12 hour format. A morning time incorrectly set to PM results in 12 hour offset that wreaks havoc on notifications. Some watches display 24 hour format by default, eliminating this confusion but requiring mental conversion for users accustomed to standard clock notation.
Date adjustment follows similar patterns. Tap the date field, then modify day, month, and year sequentially. Ensure correct year selection, as incorrect year settings cause certificate validation failures that block internet connectivity even after time correction. Save your changes by tapping a checkmark, OK, or Done button typically positioned at the bottom of the screen.
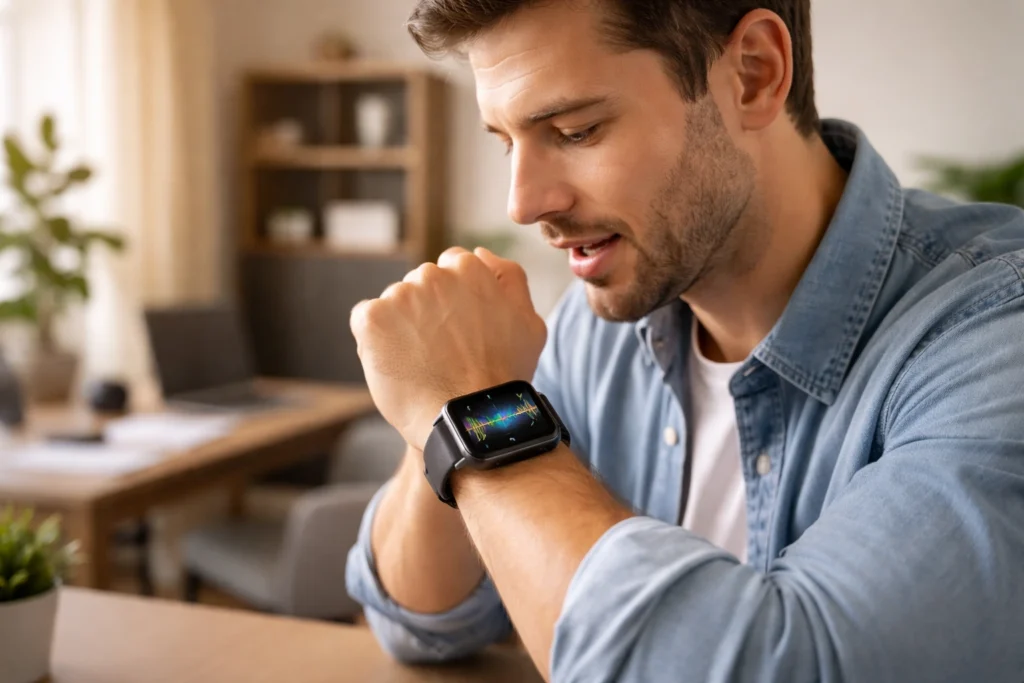
Voice Command Time Configuration
Voice assistants provide quick time adjustments without navigating complex menus, perfect for urgent corrections.
Google Assistant Commands
On Wear OS devices, activate Google Assistant by saying Hey Google or long pressing the power button. Once the assistant activates (indicated by colorful dots or waveform animation), clearly state your request: Set the time to 3:45 PM.
Google Assistant processes your command and updates the watch immediately. The assistant confirms the action verbally, responding with something like Okay setting the time to 3:45 PM. Your watch face reflects the new time instantly without requiring menu navigation or additional confirmation.
Alternative phrasing works equally well. Commands like Change the time to 10:30 Update my watch to 7:15 or Adjust time to noon all produce the same result. Natural language processing handles various phrasings, so speak conversationally rather than using rigid command structures.
Siri Integration for Apple Watch
Apple Watch users activate Siri by raising their wrist and saying “Hey Siri,” pressing and holding the Digital Crown, or pressing the Digital Crown followed by the side button (depending on settings). Siri responds with a subtle vibration and audio chime.
Command Siri with direct requests: “Set the time to 4 o’clock” or “Change my watch time to 2:30.” However, Apple Watch time synchronizes strictly with paired iPhone. Siri on Apple Watch cannot override this synchronization independently. Instead, you must change time settings on your iPhone, then synchronization propagates to the watch automatically.
This limitation means standalone Apple Watch time changes through Siri aren’t possible without modifying iPhone settings first. For users without iPhone access, manual watch menu navigation becomes necessary, though options remain limited compared to Android based alternatives.
Bixby Voice Controls
Samsung Galaxy Watch users access Bixby by pressing and holding the home button or saying “Hi Bixby” when voice wake is enabled. Bixby’s interface appears with a microphone icon pulsing to indicate listening mode.
Issue commands like “Set time to 6:30 PM” or “Change watch time to 11:45.” Bixby processes natural language effectively, understanding contextual requests without rigid syntax requirements. The assistant confirms actions verbally and displays visual confirmation of time changes.
Bixby also handles related commands like “What time is it in Tokyo?” or “Set alarm for 7 AM,” demonstrating contextual awareness beyond simple time setting. These capabilities make voice control particularly valuable for multitasking situations where hands free operation matters.
GPS and Network Time Synchronization
Automatic time updates leverage network connections for hands free accuracy.
Enabling Automatic Time Zone Detection
Navigate to your smartwatch’s Date and Time settings using methods described earlier. Look for options labeled Automatic Time, Set Automatically, or Network Provided Time. Toggle this setting to the enabled position.
With automatic time enabled, your watch queries GPS satellites, cellular networks, or WiFi access points for accurate time data. Modern smartwatches triangulate your geographical position, then apply the appropriate time zone automatically. This feature proves invaluable for frequent travelers who cross time zones regularly.
Automatic time zone detection eliminates manual adjustments when flying between regions or driving across state lines. Your watch recognizes location changes through GPS positioning and updates time accordingly, usually within minutes of entering a new time zone. Battery consumption increases slightly with continuous GPS usage, but most devices manage this efficiently through intermittent location checks.
Using WiFi for Time Updates
WiFi connectivity provides another pathway for automatic time synchronization without phone dependence. When connected to wireless networks, smartwatches communicate with time servers using Network Time Protocol (NTP). These specialized servers maintain atomic clock accuracy, ensuring your watch displays time precise to within milliseconds.
To enable WiFi time sync, ensure your watch has WiFi activated in connectivity settings. Navigate to Date and Time options and verify automatic time remains enabled. Your watch will periodically ping time servers whenever WiFi connections exist, maintaining accuracy without manual intervention.
This method works exceptionally well for users who wear watches primarily in environments with reliable WiFi, such as offices, homes, or gyms. The watch synchronizes seamlessly upon connecting to known networks, correcting any drift that accumulated during offline periods.
Cellular Smartwatch Time Setting
Smartwatches with built in cellular capability leverage mobile network infrastructure for time synchronization. Cellular towers broadcast time signals that watches receive continuously while connected to carrier networks. This eliminates both phone and WiFi dependency, creating truly standalone time management.
Activate cellular connectivity through your watch’s network settings. Ensure your cellular plan is active and properly configured with your carrier. Once connected, enable automatic time in Date and Time settings. Your watch maintains synchronization as long as cellular signal remains available, making this the most reliable autonomous timekeeping method.
Battery life considerations apply here more significantly than with other methods. Cellular radios consume substantial power compared to Bluetooth or passive GPS. Most smartwatches enter power saving modes after extended wear, potentially affecting continuous time synchronization. Monitor battery levels when relying on cellular time updates.
World Clock for International Users
World clock functionality offers creative solutions for time display challenges.
Adding Multiple Time Zones
Launch the World Clock app typically pre installed on smartwatches. The application interface displays a list of cities or lets you search for specific locations. Tap the add button (usually a plus symbol) to insert new time zones.
Search for your current city or geographical region. The app populates matching results from its database. Select your location from the list, and it immediately appears with correct local time. This display remains accurate regardless of your watch’s primary time setting, providing a workaround when main time configuration proves problematic.
Some watches allow setting world clock cities as complications on watch faces. These complications display alternative time zones directly on your home screen without launching separate applications. Customize your watch face to feature your actual current time as a world clock complication while ignoring the potentially incorrect primary time display.
Travel Mode Configuration
Advanced smartwatches include travel mode features specifically designed for international trips. This mode automatically detects location changes and prompts for time zone confirmation. When flying into new regions, your watch recognizes the geographical shift through GPS data and offers to update time settings.
Activate travel mode through Date and Time settings or a dedicated travel section in system preferences. Configure whether you want automatic updates or manual confirmation before changes apply. Manual confirmation prevents unintended time shifts from GPS drift while remaining stationary near time zone boundaries.
Travel mode often includes additional features like flight status tracking, currency converters, and timezone converters that display home time alongside local time. These integrated tools transform your smartwatch into a comprehensive travel companion beyond simple timekeeping functionality.
Daylight Saving Time Adjustments
Daylight saving time transitions occur twice yearly in many regions, shifting clocks forward or backward by one hour. Smartwatches with automatic time enabled handle these transitions seamlessly, updating overnight without user intervention. The watch recognizes the scheduled transition date and applies changes automatically.
For manual time setting users, awareness of daylight saving schedules becomes essential. Mark calendar reminders for spring forward and fall back dates relevant to your region. Manually adjust your watch time by one hour during these transitions to maintain accuracy with local time standards.
Some regions have abolished daylight saving time or use different transition dates than neighboring areas. Verify your local regulations to avoid incorrect adjustments. Certain smartwatches allow disabling daylight saving time automatic adjustments in settings, useful for regions that don’t observe these seasonal changes.
Brand Specific Setup Instructions

Different manufacturers implement unique time setting approaches worth understanding individually. If you are struggling with the initial pairing before you can access these menus, check out our companion guide on how to connect a smartwatch to any phone for a universal step by step walkthrough.
Apple Watch Without iPhone
Apple Watch presents unique challenges for phone free time setting. The device requires initial iPhone pairing for activation, making completely independent setup impossible. However, after initial configuration, limited adjustments remain possible.
Press the Digital Crown to access the app grid. Locate and tap the Settings app (gear icon). Navigate to General, then Date and Time. Here you’ll find time zone selection and format options (12hour vs 24hour). Unfortunately, Apple Watch cannot manually override time itself without modifying paired iPhone settings.
For travelers, the workaround involves changing iPhone time zone settings before losing phone access. Alternatively, Apple Watch cellular models can receive time updates through carrier networks, maintaining accuracy without direct iPhone connection. This limited independence makes Apple Watch less suitable for truly phone free time management compared to Android alternatives.
Samsung Galaxy Watch Independent Setup
Samsung Galaxy Watch offers more robust standalone capabilities. Press and hold the home button to power on, then swipe up from the bottom and tap the Settings gear. Navigate to General Management, then Date and Time.
Toggle Automatic Date and Time to the off position for manual control. Tap Set Date to adjust the calendar, then Set Time to modify hours and minutes. Use the rotating bezel (if your model includes one) for quick value adjustments, or tap plus/minus buttons on touchscreen only models.
Samsung watches with cellular connectivity or paired to Android phones via Galaxy Wearable app can enable automatic synchronization. The app provides additional configuration options unavailable through watch menus alone, but manual watch based setting remains fully functional without phone assistance.
Garmin Manual Configuration
Garmin devices excel at phone independent operation, reflecting their outdoor and fitness focus. Press and hold the Up/Menu button to access settings. Scroll to System, then press the Select button. Navigate to Time settings within the System menu.
Choose Set Time, then toggle between Auto and Manual options. With Manual selected, use directional buttons to increment or decrement hours and minutes. Garmin displays time in 24hour format by default on many models, eliminating AM/PM confusion.
For time zone adjustment, select Time Zone within the same menu. Garmin devices typically list major cities or UTC offsets rather than full geographical regions. Choose your location or the UTC offset that corresponds to your region. GPS enabled Garmin watches can also derive time zone from satellite positioning data automatically.
Fitbit Time Adjustment
Fitbit smartwatches and trackers primarily rely on smartphone synchronization for time settings. However, basic adjustments remain accessible through device menus. Swipe left from the clock face until reaching Settings. Tap the gear icon to enter configuration.
Navigate to Clock Display settings to switch between 12hour and 24hour formats. Time zone changes and actual time adjustments require the Fitbit mobile app in most cases. This design reflects Fitbit’s philosophy of smartphone centric fitness tracking rather than standalone operation.
For users without app access, Fitbit devices automatically adjust time when syncing with new smartphones or through Fitbit web dashboard access on computers. While less independent than Garmin alternatives, Fitbit’s approach ensures consistency across ecosystem devices through centralized management.
Troubleshooting Common Time Setting Issues
Even with proper setup procedures, time related problems occasionally emerge.
Time Keeps Resetting to Wrong Value
Persistent time resets often indicate automatic time synchronization conflicts. If automatic time is enabled while you’re manually setting time, the watch repeatedly overrides your changes with network provided values. Disable automatic time in Date and Time settings to maintain manual configurations.
Low battery conditions can also cause time resets on some devices. When power drops critically low, watches may lose time tracking temporarily. After recharging, the watch attempts to resynchronize, sometimes grabbing incorrect time if GPS or network signals are weak. Ensure adequate battery charge before troubleshooting other potential causes.
Firmware bugs represent another possibility. Outdated software sometimes contains timing glitches resolved in newer versions. Check for system updates in your watch’s settings menu. Install available updates, then reconfigure time settings to determine whether the update resolved the issue.
Time Zone Won’t Update
Stubborn time zones that refuse to change despite setting adjustments usually stem from location services configuration. Navigate to Privacy or Location settings and verify that your watch has location permissions enabled. Without location access, automatic time zone detection fails entirely.
GPS signal quality affects time zone recognition accuracy. Weak satellite reception in indoor environments or urban canyons prevents accurate positioning. Step outside to an open area with clear sky visibility. Wait several minutes for GPS lock, then check whether time zone updates correctly.
Sometimes airplane mode or power saving features disable location services temporarily. Exit airplane mode and disable aggressive battery saving settings that might restrict background location updates. These restrictions prevent the constant location monitoring necessary for automatic time zone detection.
Bluetooth Connection Problems
When time synchronization depends on smartphone pairing, Bluetooth connectivity issues cascade into timing problems. Begin troubleshooting by verifying Bluetooth remains enabled on both watch and phone. Toggle Bluetooth off and on again on both devices to reset the connection.
Forget the pairing on both devices, then re pair from scratch. On your watch, navigate to Bluetooth settings and select Forget or Unpair next to your phone’s name. On your phone, remove the watch from Bluetooth devices list. Restart both devices, then initiate pairing fresh following standard connection procedures.
Interference from other Bluetooth devices can disrupt communication between watch and phone. Move away from wireless routers, microwave ovens, and other electronics that emit radio frequency signals. Reduce the number of active Bluetooth connections on your phone to minimize conflicts and bandwidth competition.
Factory Reset as Last Resort
When all other methods fail, factory reset restores smartwatches to original configuration.
When to Consider Full Reset

Factory reset becomes appropriate after exhausting standard troubleshooting without success. Persistent software glitches, corrupted settings files, or failed update installations warrant complete device resets. This nuclear option erases all data, settings, and customizations, returning the watch to out of box condition.
Before proceeding with factory reset, attempt simpler solutions first. Restart your watch through standard power options. Clear cache files if your watch provides this option in storage settings. Update to the latest firmware version before resorting to reset, as updates often fix bugs that might be causing time related issues.
Consider factory reset only when time problems prevent basic watch functionality. If notifications fail, alarms don’t trigger, or fitness tracking becomes unreliable due to timing errors, reset provides a clean slate. For minor inconveniences like occasional time display glitches, less drastic measures suffice.
Step by Step Reset Process
The reset procedure varies by manufacturer but follows similar patterns. On most touchscreen watches, swipe down from the top and tap Settings. Navigate to System or General Management. Scroll to the bottom where Reset or Reset Watch options typically appear.
Tap Reset or Factory Reset, then confirm your intention through warning prompts. The watch displays stern warnings about data loss and irreversibility. Read these carefully, ensuring you understand that all information will be permanently erased. Some watches require password or PIN entry to confirm reset authorization.
For button based watches, press and hold specific button combinations (often the power button plus another button simultaneously) until the reset menu appears. Navigate using directional buttons to the Reset option, then select it. Follow on screen prompts to complete the process. The watch restarts automatically after several minutes, displaying initial setup screens.
Recovering Your Settings After Reset
Post reset, your watch enters setup mode identical to brand new devices. Follow initial configuration prompts, selecting language, region, and connectivity options. During this process, you’ll encounter time setting screens where you can establish correct time from the beginning.
If your watch previously synced with cloud services or smartphone apps, some settings may restore automatically after signing into accounts. Samsung watches recover settings from Samsung Cloud backups. Wear OS devices restore from Google account backups. These automated recoveries save significant reconfiguration time.
For watches without cloud backup, manually reconfigure all settings including time format, notifications, watch faces, and fitness preferences. This fresh start opportunity lets you optimize settings based on experience with your previous configuration. Take time to thoughtfully configure each option rather than rushing through setup screens.
For more specialized technical support and brand specific updates, we recommend exploring the following external resources:
- Official Wear OS Help Center: Detailed documentation for Google based wearables.
- Garmin Support: Setting Time Manually: Specific button combination guides for every Garmin model.
- Apple Watch User Guide: Official instructions for managing time and world clocks on watchOS.
Conclusion
Setting time on your smartwatch without relying on companion apps empowers you with device independence. Whether using manual menu navigation, voice commands, network synchronization, or creative workarounds like world clocks, multiple pathways exist to maintain accurate timekeeping. Understanding your specific watch’s capabilities and following brand appropriate procedures ensures success regardless of circumstance.
Practice these methods before emergencies arise. Familiarity with your device’s menu structure and button functions transforms potential frustration into quick confidence. Bookmark this guide for future reference, and remember that even sophisticated smartwatch technology ultimately serves you master its functions rather than becoming mastered by them. Your wrist deserves accurate time, app or no app.
Frequently Asked Questions
Can I use a smartwatch without ever connecting it to my phone?
Many smartwatches function independently for basic operations like time display, alarms, and fitness tracking. However, initial setup typically requires smartphone pairing for activation. After setup, GPS enabled and cellular models operate autonomously, while Bluetooth only watches need periodic phone connection for synchronization and data transfer.If you need help with this first step, see our detailed guide on connecting your smartwatch to any mobile device.
Why does my smartwatch time keep changing automatically?
Automatic time synchronization causes unexpected time changes when enabled. Your watch receives time updates from GPS satellites, cellular networks, or paired smartphones, overriding manual settings. Disable automatic time in Date and Time settings to maintain manual time configurations without network interference.
How do I change my smartwatch from 24hour to 12hour format?
Navigate to Settings, then Date and Time or Clock Display options. Look for Time Format settings that toggle between 12hour and 24hour displays. Some watches call this Clock Format or Time Display Style. Select your preference, and the watch face immediately reflects the format change.
Will my smartwatch work if I don’t have a smartphone?
Basic functions like time display, alarms, stopwatch, and onboard fitness tracking work without smartphones. Advanced features like text message replies, app installations, detailed health analysis, and payment services require phone connectivity. Smartwatches with built-in cellular capability offer more independence but still need initial smartphone setup.
How do I fix my smartwatch when it shows the wrong time zone?
Enable automatic time zone detection in Date and Time settings if you want automatic updates based on GPS location. For manual control, disable automatic settings and manually select your correct time zone from the available list. Ensure location services have necessary permissions if using automatic detection.
Can I set an alarm on my smartwatch without an app?
Yes, all smartwatches include built in alarm functionality accessible directly from the device. Look for an Alarms or Clock app in your watch’s application menu. Tap to create new alarms, set times using on screen controls, and configure repeat schedules without requiring smartphone assistance.
Do all smartwatches need a phone to function properly?
Most smartwatches require phones for complete functionality but maintain core features independently. Initial activation mandates phone pairing across nearly all brands. After setup, watches operate autonomously for time display, fitness tracking, and pre installed apps, though advanced features benefit from continued phone connectivity.